Creating Your First Template
NOTE
Linked Lovelace runs commands on behalf of the user's browser to modify dashboard configurations, not on behalf of the Home Assistant system. A user's access may modify the outcome of the program.
Always back-up your configs if you feel unsure about what you are about to do!
What defines a card as reusable?
In our case, it would be a card that we want to use multiple times.
Without Linked Lovelace, the only way to synchronize a card made in the UI is to copy the code in the code editor, and paste it where you want the update to go.
The Copy Paste Method
For our example, we'll be creating a button card that creates a persistent notification to help demonstrate synchronization.
Making a card into a template
To mark a card as a template for Linked Lovelace to consume, we need to add the key ll_key to the top-level of the card's YAML. This will break the UI editor.
Before:
show_name: true
show_icon: true
type: button
tap_action:
  action: call-service
  service: notify.persistent_notification
  target: {}
  data:
    message: A user needs help
    title: Help Wanted!
icon: mdi:help
name: Request Help
After:
ll_key: help-button
show_name: true
show_icon: true
type: button
tap_action:
  action: call-service
  service: notify.persistent_notification
  target: {}
  data:
    message: A user needs help
    title: Help Wanted!
icon: mdi:help
name: Request Help
By adding this single line Linked Lovelace becomes able to identify help-button as a template.
Converting a card into a template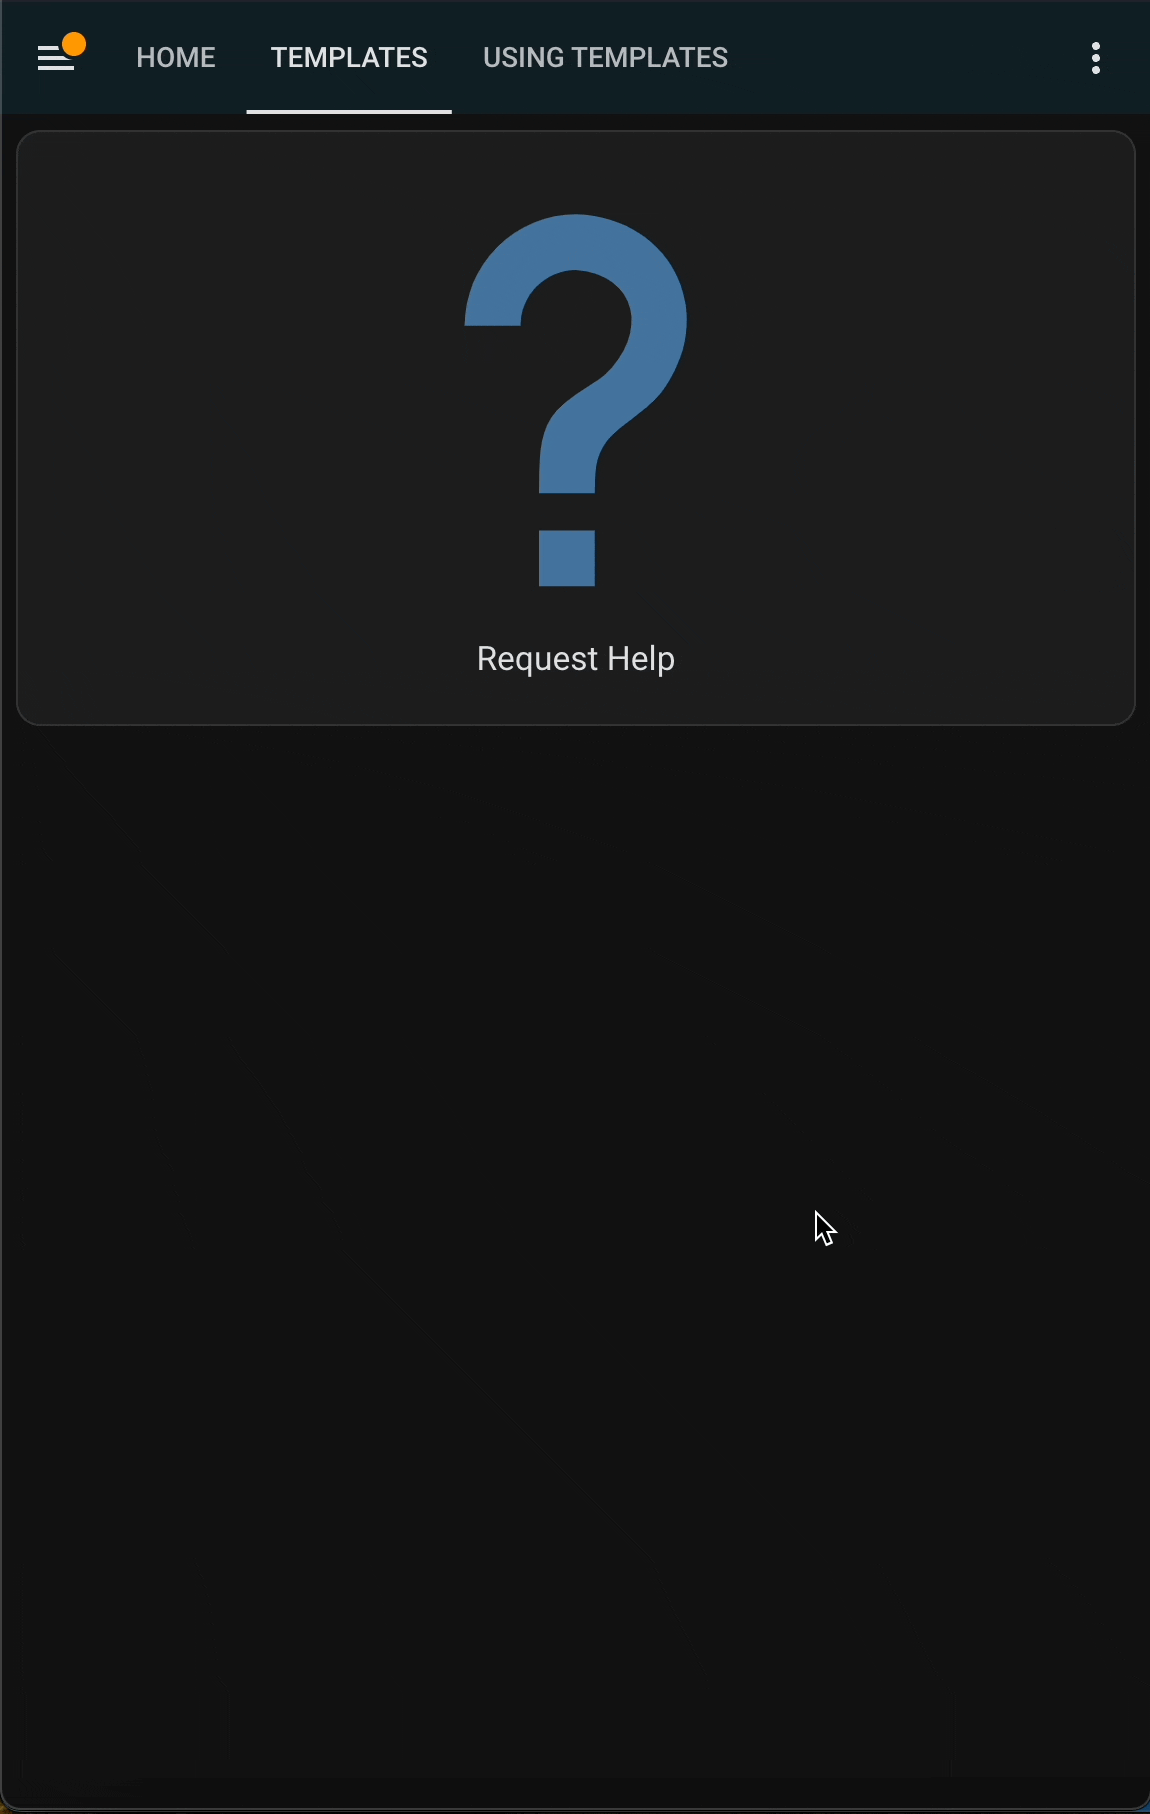
Use the template
Now that we've created our first template, we'll use the Template card to help us place it on a new Dashboard/View. We can do this in one of two ways.
- Use the UI Selector to choose the Linked Lovelace Template card
type: custom:linked-lovelace-template. This card will look up our available templates, and swap the code needed for the Status card to work properly into place with just a button click.
- Modify any new or existing card yaml to have the top level key
ll_templatewith a value that matches thell_keyvalue we created earlier. In our example. this would behelp-button.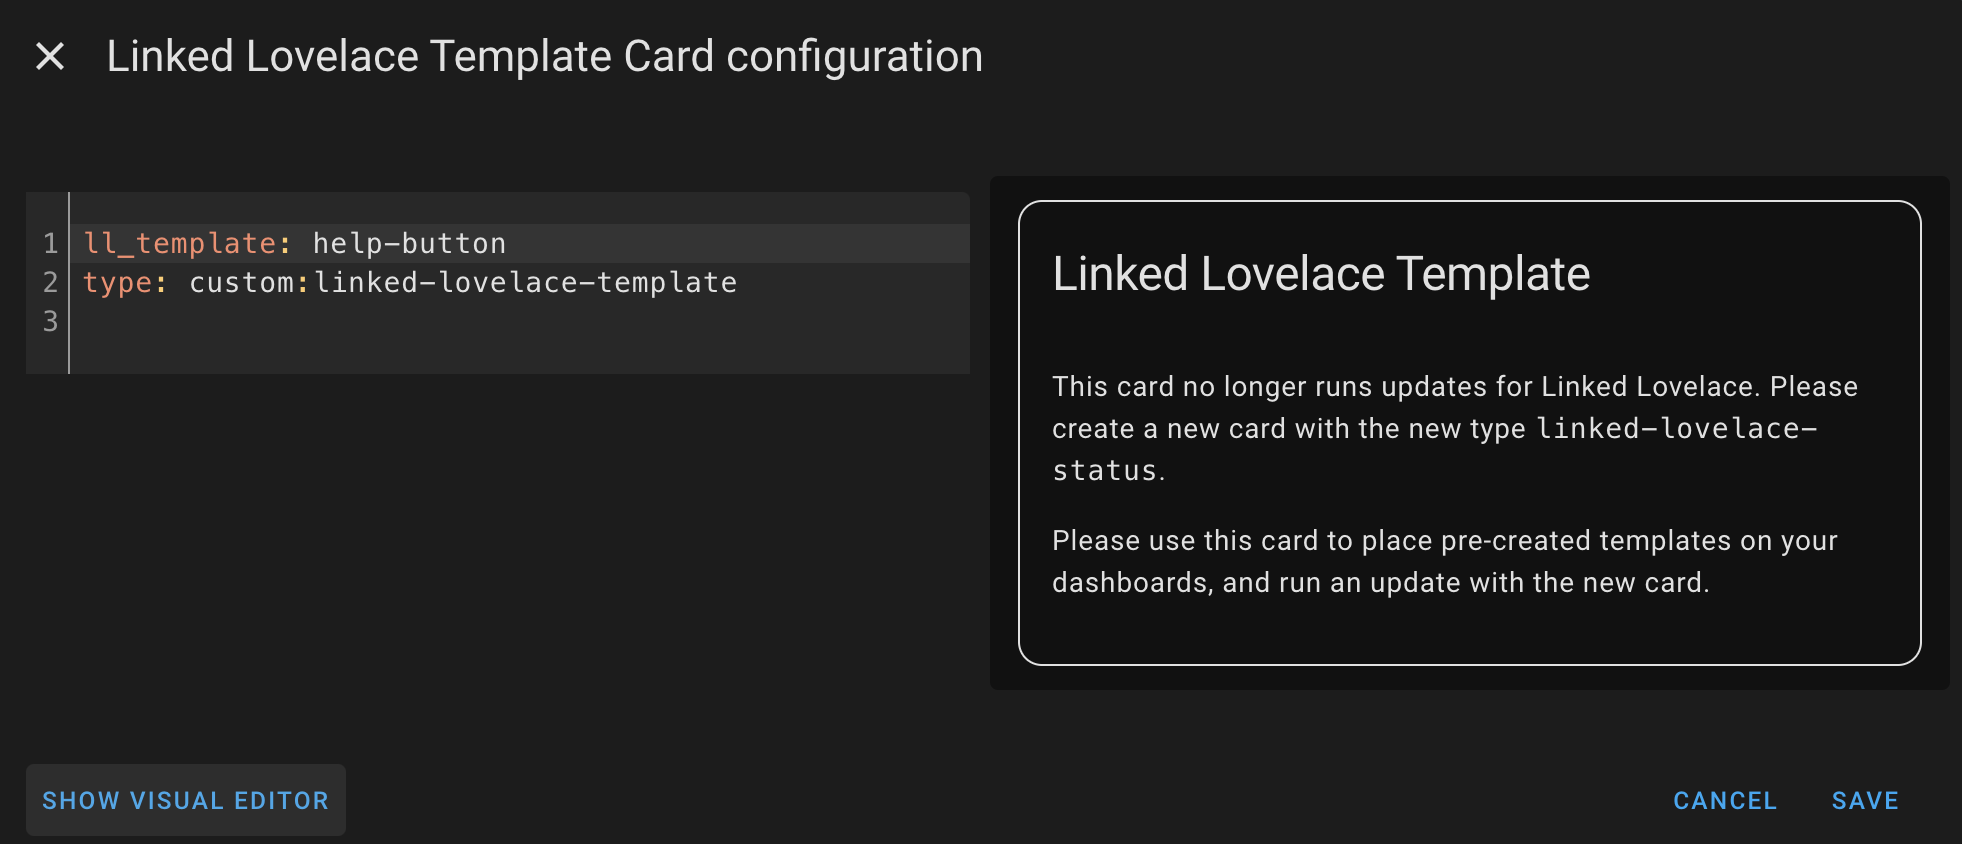
Using a template, both ways
Synchronize the template
While we've created our template and placed it on a dashboard, we haven't actually done anything with it yet. To see the power of Linked Lovelace, we'll want to make a change to our original card and synchronize that to where we used the template.
Before moving onto the next step, update your original card, the one with ll_key to have some difference. Any at all! It can be purely in the code editor, but it's much more satisfying to see some visual change get synchronized.
For our example, we'll edit the message just slightly.
Before:
ll_key: help-button
show_name: true
show_icon: true
type: button
tap_action:
  action: call-service
  service: notify.persistent_notification
  target: {}
  data:
    message: A user needs help
    title: Help Wanted!
icon: mdi:help
name: Request Help
After:
ll_key: help-button
show_name: true
show_icon: true
type: button
tap_action:
  action: call-service
  service: notify.persistent_notification
  target: {}
  data:
    message: A user clicked help
    title: Help Wanted!
icon: mdi:help
name: Request Help
Once that's done, move ahead to get started using the Status card